Blinking LED Demo - AURIX TC397
In this tutorial, we will use the Lauterbach TRACE32 application to flash a blinking LED program onto the TC397 board’s internal program memory. After programming the device, we will verify the result by observing the LED behavior through a camera view. The camera application will be available as a separate Action within the same Workspace.
Assumptions
-
A TC397 board is functional and accessible.
-
Lauterbach TRACE32 is properly installed on the board.
Prerequisites
-
A TC397 board connected to the Sleeve Dock.
-
A configured Workspace for the TC397 board. If you have not created a Workspace yet, follow this guide: How to create a new Workspace.
-
A Webcam already mounted to the Sleeve Device. If you have not mounted a System Device yet, follow this guide: How to mount a new System Device.
-
The Blinking LED Demo, a CLI Image as a predecessor to the desktop Image, and the webcam image from the provided links.
Image Links
-
Get the CLI Predecessor Image from this URL:
docker.io/amazon/aws-cli:latest -
Get the Webcam Image from this URL:
registry.gitlab.com/sleeve.dev/sleeve-community/webcam:latest -
Get the Trace 32 LED Demo Image from this URL:
registry.gitlab.com/sleeve.dev/sleeve-community/lauterbach/trace32:latest
Preparing the Actions
The Demo-Binaries Action
In your TC397 Workspace, create an Action by clicking on the button, Select Container and Shell. Fill in the initialization fields as follows:
| Field | Value |
|---|---|
| Name | Demo-Binaries |
| Container Image | CLI Predecessor image |
| CPU Architecture | Native |
| Script | s3 sync s3://sleeve-demo/Infineon/Aurix/ /sleeve/application/ |
Leave the rest empty and create the Shell Action.
The Desktop Action
In your TC397 Workspace, create an Action by clicking on the button, Select Container and Desktop. Fill in the initialization fields as follows:
| Field | Value |
|---|---|
| Name | TC397-Demo |
| Container Image | LED Demo image |
| CPU Architecture | Native |
| Keyboard | Empty (select a different language if you prefer) |
| Username | sleeve |
| Password | sleeve |
| Predecessor | Demo-Binaries |
Leave the rest empty and create the Desktop Action.
The Webcam Action
Note
- This creation of the webcam Action is optional to observe the blinking LED and may be skipped freely if no webcam is available.
Similar to the Workspace step, create an Action and fill in the initialization fields the same way. Just change the image to the webcam image, remove the predecessor field, and give it a different name such as Webcam.
Example
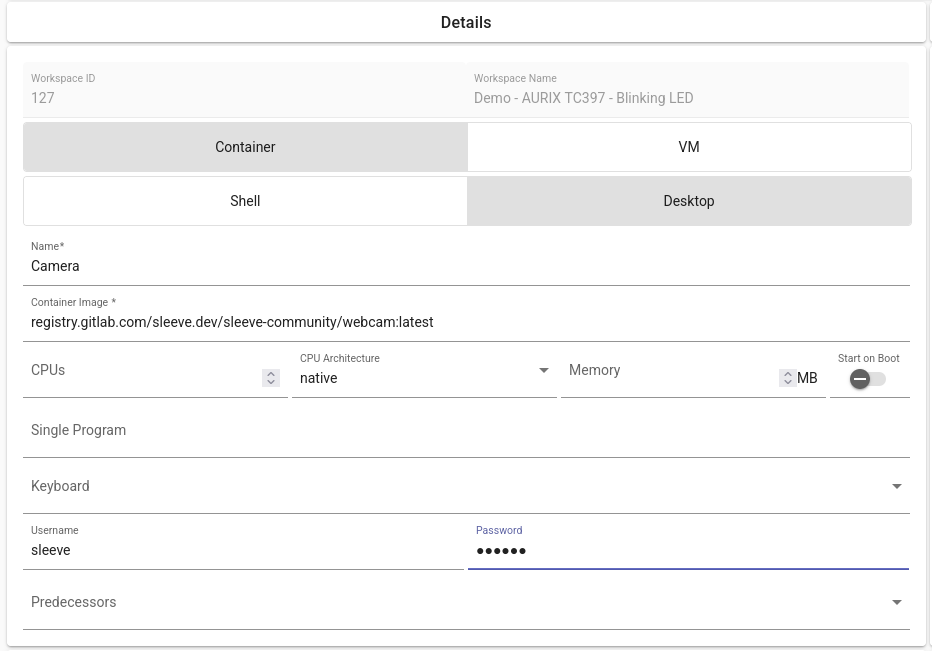
Flashing the board`s memory
- From your TC397 Workspace, run the TC397-Demo (by clicking on the blue monitor icon) Desktop Action.
- On the new window, start the Action by pressing the icon if it has not started.
Tip
- You may need to change your view using the button for a GUI view.
- Locate and run the TRACE32 application on the container desktop.
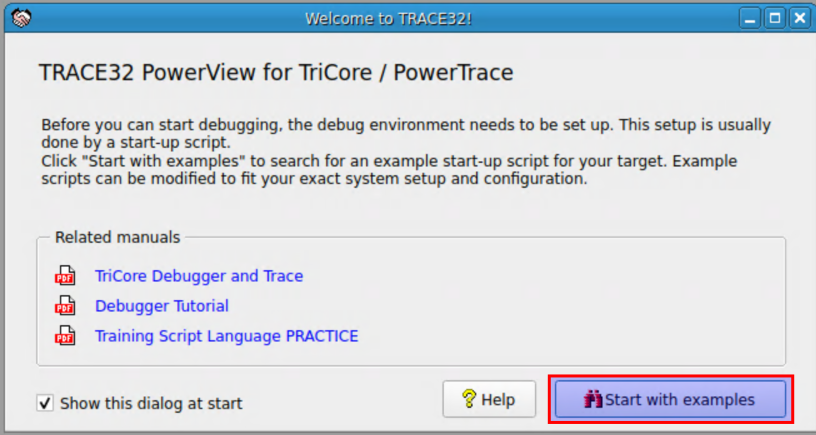
- On the popup window that opens after the application has connected to the board, click on the Start with Examples button.
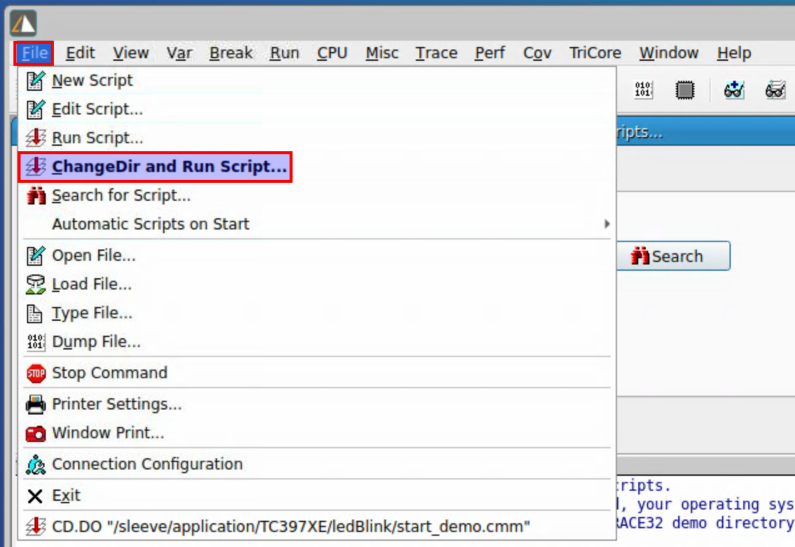
- Now select the script we would like to run, the LED blinking script, by clicking File button and then ChangeDir and Run Script.
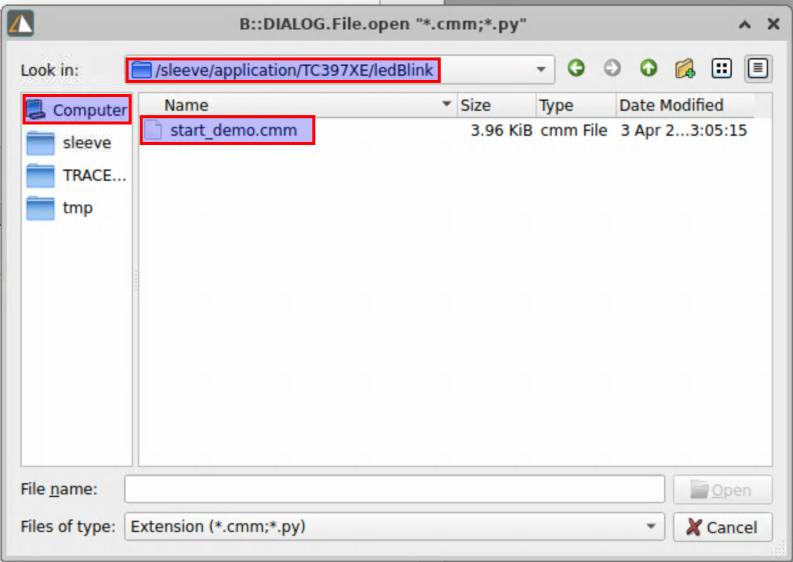
- Navigate to the “/sleeve/application/TC397XE/ledBlink” folder and select the file “start_demo.cmm”.
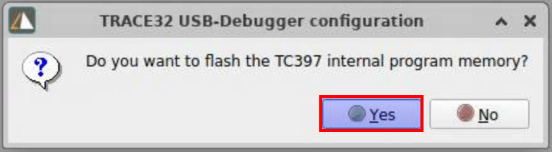
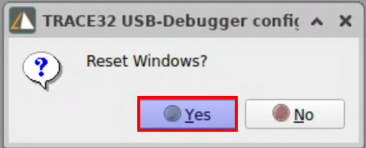
- Click Yes on the popup window when asked “Do you want to flash the TC397 internal program memory?” and then again Yes on the “Reset Windows?” popup.
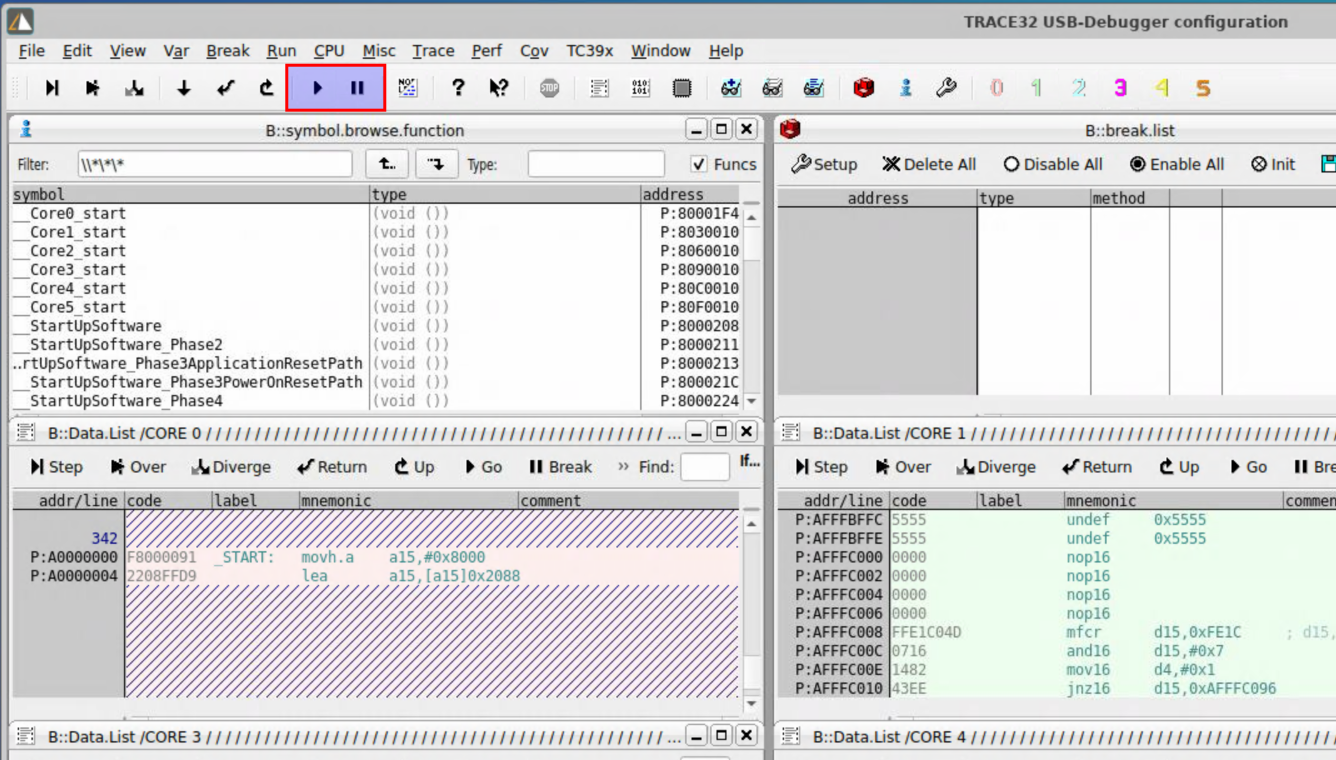
- A multi-card window will open. You can start and stop the blinking led demo by pressing the play and pause buttons.
Observing the results
- Return to your TC397 Workspace and run the Webcam Desktop Action.
- Navigate to the Action window and start the Action if it has not started.
- Click on the webcam application on the desktop and observe the LED blinking.
Success
You have successfully flashed the TC397 board and verified the LED blinking using Sleeve Hub!
Troubleshooting
In case of the board not recognizing any USB devices, restarting your Desktop and/or webcam Action may resolve the issue.
Make sure the board is properly connected with the USB cable.
Question
Any other troubles? Click here!